Illustrations were created by Spitfire Industry
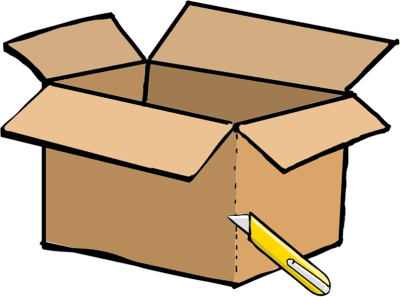
Winter is the best time of year for DIY projects—especially those that make the season even more delightful. After your holiday packages have arrived at your doorstep safe and sound, reuse those corrugated cardboard boxes to create winter delights. Head out-of-doors with our cardboard sled or stay inside with our dartboard. Can’t decide to play indoors or out? Our bean bag toss works for both environments. The finished games are all child-safe, but if you’re making these with wee ones, handle all cutting and hot gluing yourself.
Sled
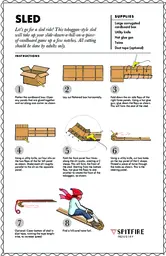
Let’s go for a sled ride! This toboggan-style sled will take up your slide-down-a-hill-on-a-piece-of-cardboard game up a few notches. All cutting should be done by adults only.
Supplies
- Large corrugated cardboard box
- Utility knife
- Hot glue gun
- Twine
- Duct tape (optional)
Instructions
Step 1: Flatten the cardboard box: Open any panels that are glued together and cut along one corner as shown.

Step 2: Lay out flattened box horizontally.

Step 3: Fold down the six side flaps of the right three panels. Using a hot glue gun, glue down the flaps as shown. This will form the seat of the sled.

Step 4: Using a utility knife, cut four slits on the two flaps of the far left panel as shown. Make each slit roughly parallel to the slit on the opposite panel.

Step 5: Fold the front panel four times along the slit marks, creating a C shape. This will form the front of the sled. Starting from the bottom flap, hot glue the flaps to one another to create the front of the toboggan, as shown.

Step 6: Using a utility knife, cut two holes on the top panel of the C shape. Thread a piece of twine through the holes as shown. This is the steering panel.

Step 7: Optional: Cover bottom of sled in duct tape, running the tape lengthwise, to increase speed.

Step 8: Find a hill—and have fun!

Dartboard
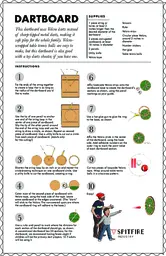
This dartboard uses Velcro darts instead of sharp-tipped metal darts, making it safe play for the whole family. Velcro-wrapped table tennis balls are easy to make, but this dartboard is also good with a toy darts shooter, if you have one.
Supplies
- 1 piece string or twine, at least 2 inches longer than the desired diameter of the dartboard
- 2 pieces corrugated cardboard, at least 18 inches in diameter
- 2 pencils
- Utility knife
- Velcro tape
- Scissors
- Ruler
- Velcro strips
- Circular piece Velcro, around 2 inches in diameter
- Number stickers
- Hot glue
- Table tennis balls
Instructions
Step 1: Tie the ends of the string together to create a loop that is as long as the radius of the dartboard you’d like to make.
Step 2: Use the tip of one pencil to anchor one end of the string loop in the center of one piece of cardboard. Slip the tip of the other pencil around the end of the string loop and use the string to draw a circle, as shown. Repeat on second piece of cardboard. Use a utility knife to cut out a circle from each piece of cardboard. (Adults only for the cutting!)

Step 3: Shorten the string loop by an inch or so and repeat the circle-drawing technique on one cardboard circle. Use a utility knife to cut the cardboard, creating a ring.

Step 4: Cover most of the second piece of cardboard with Velcro tape, using the hook side of the tape. Leave some cardboard at the edges uncovered. (The “darts” will stick to the Velcro. The non-covered spots are where the cardboard ring will adhere to the base.)

Step 5: Use a ruler and pencil to mark where the divisions for each section of the dartboard should go, as shown. A conventional dartboard has 20 sections; for this dartboard, we recommend having fewer—eight if children will be the primary dart players; 12 if adults will be using it.

Step 6: Affix hook-side Velcro strips onto the cardboard base to create the dartboard’s sections as shown, using the pencil markings as your guide.

Step 7: Use a hot glue gun to glue the ring to the base, as shown.

Step 8: Affix the Velcro circle in the center of the dartboard, using the hook side. Add adhesive numbers on the outer ring to mark the point value of each dartboard section.

Step 9: Cut two pieces of loop-side Velcro tape. Wrap around table tennis balls in a criss-cross pattern.

Step 10: Enjoy!
Beanbag Toss
Perfect for impromptu tailgating! We suggest placing canned food or other sturdy weights at the top corners of the box when you’re ready to play; this will help stabilize the box.
Supplies
- Large corrugated cardboard box
- Ruler or yard stick
- Pencil
- Utility knife
Instructions
Step 1: Lay the box on its long side. Using a ruler or yard stick and pencil, draw a diagonal line between two opposite corners. Turn the box over and draw the same line on the other side, but on a reverse angle.

Step 2: Lay the box on its long side. Using a ruler or yard stick and pencil, draw a diagonal line between two opposite corners. Turn the box over and draw the same line on the other side, but on a reverse angle.

Step 3: Use a utility knife to carefully cut along the diagonal lines on the sides of the box. (Adults only for this part!) Cut along the top and bottom corners.

Step 4: Separate the two halves of the box. Each half is now shaped like a ramp. Flip one “ramp” over.

Step 5: Draw a beanbag hole on the main surface, then use a utility knife to carefully cut out the hole.

Step 6: Remove the cardboard cutout.

Step 7: Play

If you're looking for more holiday activities, take a look at these printables to help celebrate all year long.


